


As I explained previously, I am just beginning my fitness journey. Something I recently learned and have tried to share with others is that variety is key if you want to see results.
Don’t believe me? Check out these studies where fitness experts explain just how important it is.
What Are Battle Ropes & Why do I Want to Make Them?
No longer just for MMA fighters or athletes, battle ropes are popping up all over the place across the fitness community. And for good reason. No matter where you’re at in your fitness journey, battle ropes offer an amazing, full-body workout that’s pretty dang fun.
Aside from variance helping you yield results, a varied approach is also just a more enjoyable way to work out. Doing the same workout routines month after month can start to get boring! Enter fun, versatile BATTLE ROPES!!!
I mean it’s in the name people - Battle ropes just sound like a good time especially up against “dumbbell work” or “bench press”. And what’s even cooler is that DIY battle ropes are ridiculously easy to make! (Seriously though, they almost require ZERO effort! So if you can’t make this DIY happen, you may just want to hang up your DIY hat, fam.)

Even though I haven’t been working out very long, I watched my father train for years. The man was relentless. He (in his 70s) would be sick as a dog in bed - and still go train. He told me once, “It’s on the days you don’t want to work out that you MUST!” Now as an adult, I can still hear those words in my head when I want to make an excuse and bail on my buddy, Susie.
It’s on these days that I try to find a WHY to my hang up. Why am I not excited? Why am I not being driven? You know what the answer is most of the time? My routine has gone stale.
I’m over the classic barbell and bumper plate set up and I need a change up where the actual GEAR changes instead of just the exercises! We can change up the routine all day but if Susie and I are still using the same stuff, I can start to lose interest fast.
You may be thinking, “Well, I don’t have the resources to be able to switch up gear like that.”
But that’s where you’d be wrong.
This is what this DIY Space at Fringe is all about: great gear on a budget built by YOU. Today, we’ll show you how you can make yourself battle ropes for less than $10 and with little effort.
If you aren’t familiar with them, check out the video below really quick. It’ll show you how they’re used and give you some best practices on how to use them.
Now that you’re up to speed. I’ll explain how to make your own! (And for you non-DIYers, I’ll also explain how to get a readymade battle rope as a quick, budget-friendly solution.)
How To Make Battle Ropes
These ropes will get your heart rate pumping just as good as store-bought ones, but for less than half the cost. You might even already have most of what you need - to make that possibly even no cost at all!
DIY Option #1 Garden Hose Battle Ropes
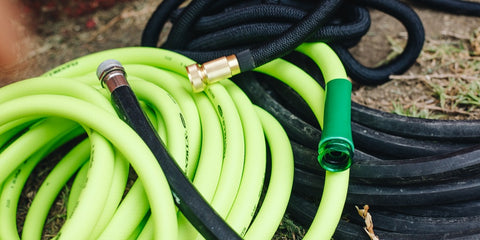
Step #1 Locate A Hose
Have a yard? Then you probably already have a garden hose or a few of them. And if you’re a packrat like me, you probably even have one or two old beat up ones that you’ve been saving to repurpose. Great news: Now is the time to use them!!
For those of you who do not have a garden hose, don’t fret! You can still make DIY battle ropes. You’ll just have to purchase a garden hose from your local hardware store for less than $20. The ideal length being 50 feet as these are typically how long battle ropes are. (Budget Tip: Amazon has them for less than $15! I know this is more expensive than $10, but it's still an excellent deal as battle ropes can run you anywhere from $25 to $150+.)
Step #2 Start Using It!
If you haven’t worked out in a minute, a garden hose could weigh enough for you at first, especially as you “learn the ropes” (see what I did there?) when it comes to the various exercises.
Looking for more? Check out some other great battle rope exercises here.
Step #3 (optional) Add Weight
However, the whole point of this is to get stronger, right? So eventually, you will need to increase the weight somehow. We recommend getting a bag or two of play sand (for sandboxes) which can run you about $4. Not too bad, huh?

The only catch is that it can be a real pain trying to fill a hose with sand. Once you can do that though, you’ll be able to add about 10-20 pounds of weight to your garden house (assuming you have a 50-foot one).
Pro Sand-Filling Tips
- The drier the sand, the easier it is to fill the hose.
- Use duct tape to seal the ends of the hose
- Filling sand just not working? Ditch the sand and use water for a quick and easy alternative. Just make sure you cap it with plumbers tape.
Step #4 Make An Anchor
Whether you filled it up or you didn’t, you can take your garden hose and wrap it around a tree, a post, a column, a fence, or something else heavy to secure it and to create an anchor point.
Don’t have anything like the above? String the garden hose through the handle of a heavy kettlebell or bumper plate and then secure the kettlebell or plate by piling sandbags on top of it.
DIY Option #2 Fire Hose Battle Ropes

This is the IDEAL “DIY” for you non-DIYers out there.
Step #1 Locate a Fire Dept
Don’t have a garden hose and not trying to buy one? Get in touch with your local or neighboring fire dept!
Fire hoses have to be decommissioned after a while as they start to deteriorate. The idea would be for you to swoop in and grab one of these before they get thrown out.
The cycle is so regular and consistent that they will likely be grateful that you are taking some off of their hands. I say some instead of one because you never know if you’ll need a backup or just want to use one with a friend.
Step #2 Transform It
You’ll most likely get a hose with metal caps on both ends which you don’t need. Simply take a hacksaw and remove them for good! If you don't own one and don't have access to one, you can get one on Amazon for less than $8. I've heard of some people leaving couplings on there for hauls, but since these are for battle ropes, you really must remove the metal pieces.
After, secure both ends of the fire hose with a few wraps of duct tape.
***Pro Tip: fold the ends over on themselves and then apply the tape.

Step #3 Add Weight (optional)
Again, when you first start, the fire hose will feel extremely heavy - much heavier than the garden hose. But as you progress in your training, this will change, and you will eventually need a greater challenge. I’m still good with using the regular hose though and I’ve been training for 4 months now haha. So hold off on this step until you know you’re ready.
When the day comes that you're ready to increase the weight, cut the duct tape off of one end of the hose and fill the hose with sand or whatever sediment you prefer. Good news: Filling a fire hose is much easier than filling a garden hose. WOOHOO!
Whichever way you decide, stick with it and you will see results! Battle ropes are fun but they are also killer. Get ready to put in some work and get a lot back in return!
Do you like using battle ropes regularly? Tag us in one of your WODs on social or tell us in the comments.
Guest Blog Author: Sydney Capello