BUILD UPPER BODY STRENGTH ANYWHERE WITH OUR PULL-UP BAR BY FRINGE SPORT
A sturdy pullup bar is one of the basic building blocks of a garage gym or affiliate- and the ceiling/wall mount pull-up bar system is a great pull-up bar, at a great price. This system installs directly into your studs and offers 2 different installation options for the bar.
Installation is straightforward and should take you 30 minutes with a stud finder, drill, ratchet set, and a screwdriver. Once you get the Fringe Sport bar installed into your studs, you'll have a rock-solid place for kipping pull-ups, dead hangs, mounting rings, mounting pull-up bands, and more.
- This pullup bar is for 8-10 foot ceilings or wall mounting.
- Easily adjustable - set the bar to be 14" or 22" from wall or ceiling.
- Backed by our full-year satisfaction guarantee.
Contains
2 - brackets and 1 - 48" crossbar. Hardware for stud installation is included
Diameter
1 1/4" O.D. (Outside Diameter)
Bracket Dimensions
2 inches wide, 25.25 inches tall, and 24.25 inches deep
Weight
23 pounds
Weight Capacity
600 pounds
Material
14-gauge steel
Warranty
1 Year
Product ID
2209
The Fringe Sport Pull-Up Bar can be used for various functions, such as ring rows, weighted pull-ups, kipping pull-ups, butterfly pull-ups, toes to bar, Knees to elbow, etc. It is perfect for someone who wants to focus on bar work in the comfort of their garage, and still accommodate for the vehicle to park inside.
Here are installation instructions:
Installing a pull-up bar system is quick and easy! Here's how:
What You'll Need
- Minimum of 14 volts corded or cordless drill
- 3/16 in drill bit, minimum of three inches in length
- 17mm and 13mm sockets
- 3/8 in adapter (turns cordless drill into socket driver)
- Stud Finder
- Tape Measure
- Marker/Pencil
Step 1:
- Locate the center of two opposing studs, either on a wall or ceiling, make sure the distance between the studs is the same as the length of your pull-up bar system!
Step 2:
- Using one of the pull-up bar support beams as a guide, place it along the length of your first stud, and mark where your first pilot hole will go. It is also important to measure the distance between each end of the pull-up bar support beams and the edge of the wall or ceiling, to ensure that both support bars of the system are exactly parallel to one another before mounting.
Step 3:
- Drill your first pilot hole, you'll know you hit a stud if you feel stressing and wood dust covers the bit when you remove it from the hole. Next, put your first lag bolt in, there is no need to install bolt completely just yet.
- Use the remainder of the holes along the support beam to drill your pilot holes, and install lag bolts.
- When you have measured the distance between the support beams and the edge of the wall or ceiling and insured they are parallel, repeat the same process with your second support beam.
Step 4:
- With both support beams installed and loose, slide in and bolt your crossbeam.
Step 5:
- Tighten the lag bolts of the support beams and start doing pullups!
There are a few differences, the stud bar's brackets come in different sizes based on your ceiling height. The Fringe Sport brackets are all the same length. The Stud bar's pull up bar is not adjustable, the Fringe Sport one is. The Stud Bar can only be mounted on the ceiling, the Fringe Sport can be on the ceiling or the wall.
If properly installed it can hold up to 600lbs.
Yes! As long it is installed through the studs. You can make it extra secure by going in the attic and bolting it through the rafters with a nut and bolt to secure it all the way through the beam.
You can do the following and more: strict pull-ups, weighted pull-ups, kipping pull-ups, butterfly pull-ups, toes to bar, knees to elbow, strength band stretches, weighted abs, bar muscle-ups (depending on ceiling height), ring rows, ring dips, ring muscle-ups (depending on the ceiling height), etc.
- Our Strength Bands
- Our rings + straps
- Can't forget chalk
- Leather gymnastic grips to help keep your hands rip-free!
ASSEMBLY INSTRUCTIONS:
- Reviews
- Questions
Wall Mount Pull Up Bar
Solid, good quality materials. Easy to install. Took about 1 hours. Tip. Spend as much time as you need to locate studs and lay out the installation area.
Sturdy pull up bar
Straight forward to install, feels very sturdy. Mounted to ceiling rafters in basement. Good product.
Easy to set up once you align the studs. Take your time to line everything up correctly before drilling. Rock solid.
Great pull-up bar with manufacturing flaw
I subtracted one star due to the slightly bent bracket out of the box. The bent was small (about 1/8 inch total), but was enough to create a gap between the wall and the mounting. Not a deal breaker but it is something to pay attention to. The buying experience was super great. Lauren helped me with this order and made the process really simple and quick. I received the pull-up bar in two days, and I was pleasantly surprised with this weekend gift. The installation was simple enough. I did not use the lag screws provided as I intended it to be installed onto the cinderblock wall in my garage. I used 5/16 Tapcon anchors (for the solid portion) and 1/4" Tapcon screws (for the hollow portion) and it is very secured. The rod has a nice powder coat texture to it; not too rough and not too smooth to allow for a good grip without destroying the hands. Overall a good buy.
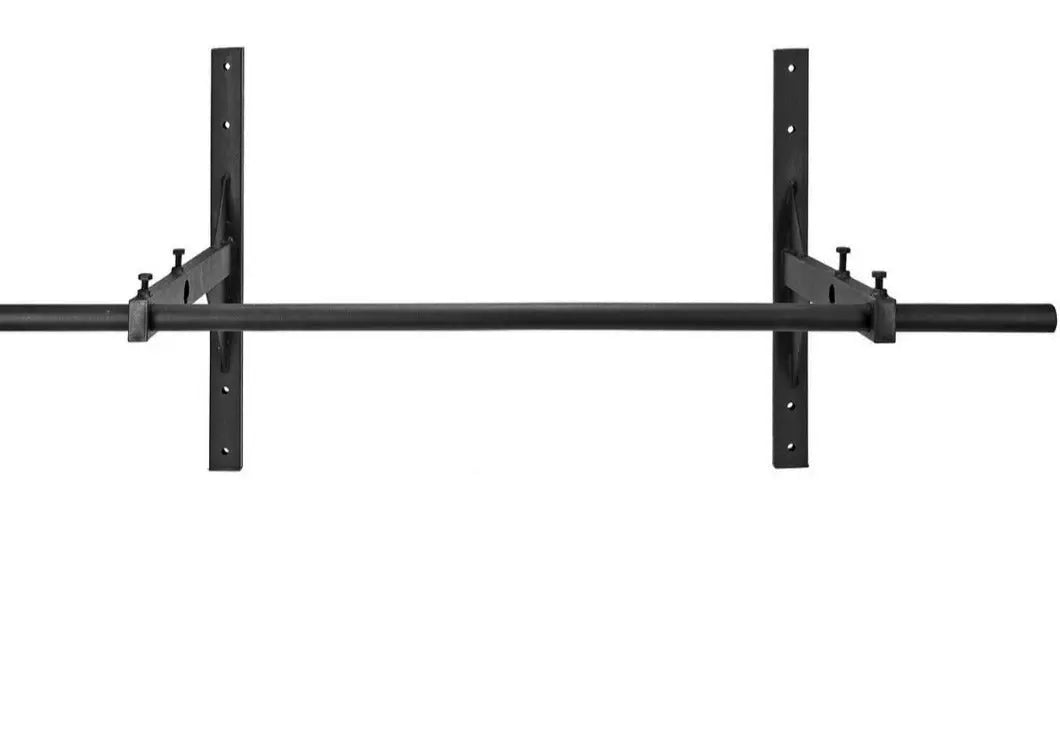
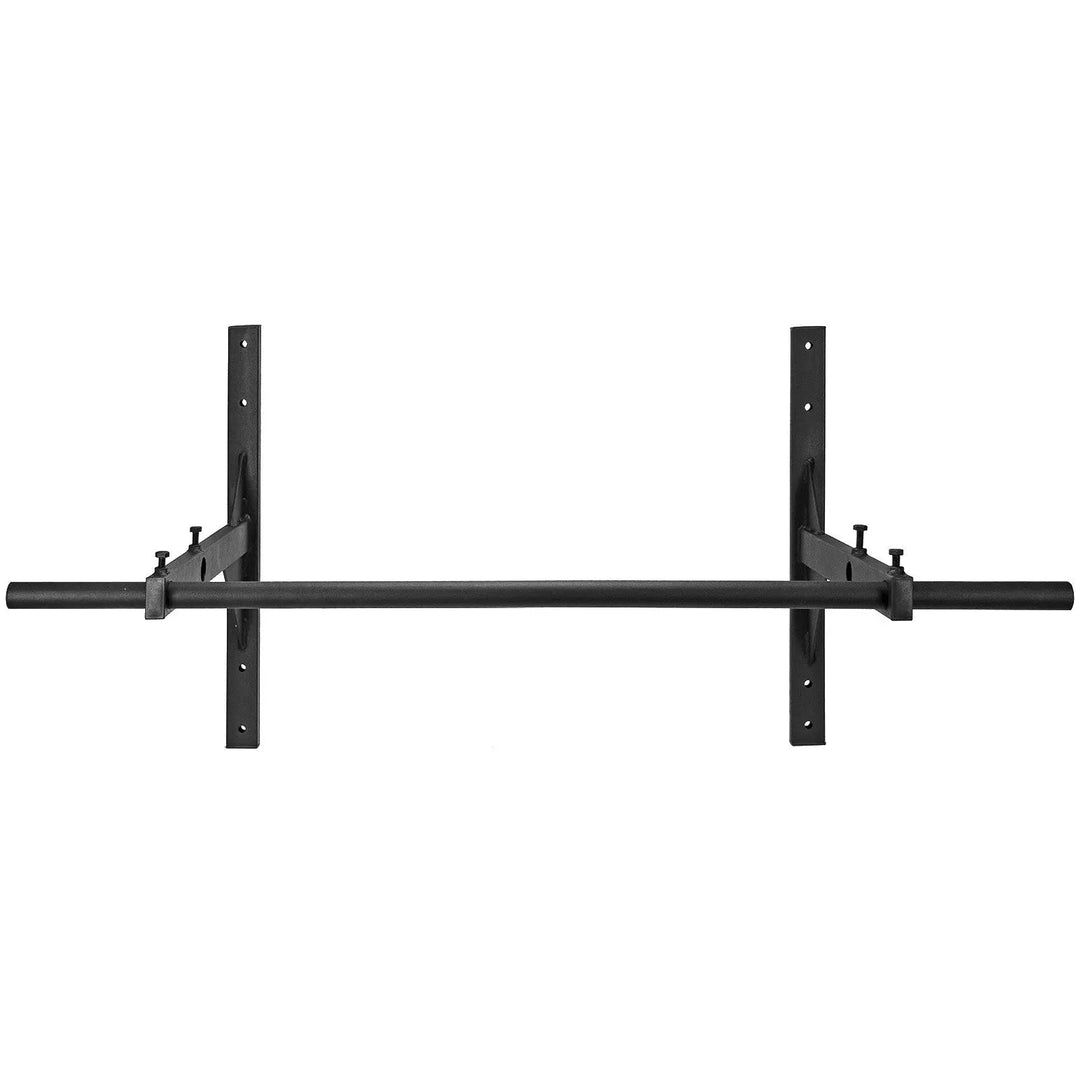
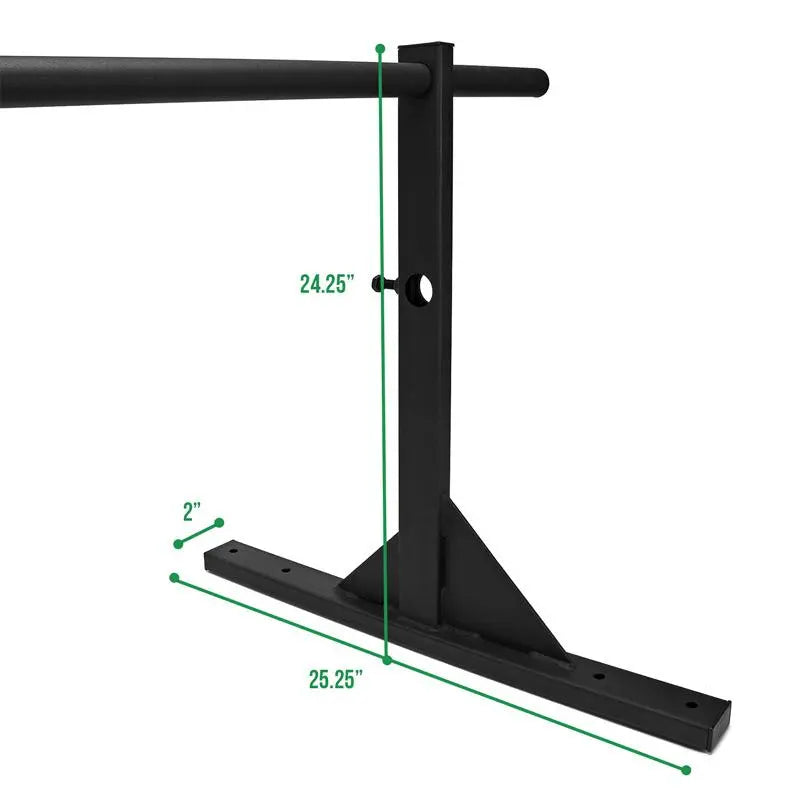
Pullup Bar System for Ceiling/Wall
Good quality bar, It is working out perfectly for us!
Required By California Law - WARNING: This product may have materials, which are known to the State Of California, that can cause Cancer and Reproductive Harm. For more information, California Prop 65: https://www.p65warnings.ca.gov/