

How To Build a Home Gym On a Budget
How nice would it be if you could walk in your garage and squat in your pajamas? Or if you could avoid bad weather, commute or just train with the equipment you want?
Not everybody wants a gym membership. A great home gym for barbell and specialized training doesn't need to be a huge investment. There are only a few staples that you must focus on, and today we will break them down so you can build an awesome gym on a budget.
While the equipment is simple, you can save a lot of money by anticipating the kind of detail you only pay attention to after you bought something. The goal here is to bring them to your attention before you do it.
Planning & Considerations For a Cheap Home Gym
If you always wanted to have your own iron temple, but are concerned about neighbors complaining, fear not. I will show you how you can avoid noise complaints, and even how some noise (music) can even aid your performance.
Atmosphere
I couldn't find any evidence that suggests that you are going to become a PR machine just because you listen to your favorite song, but being in sync with your gym will make your life better.
While you won't get mysteriously stronger by listening to music you like, you will have increased endurance, improved mood and look forward to your workouts, which translates into greater consistency (study, study, study).
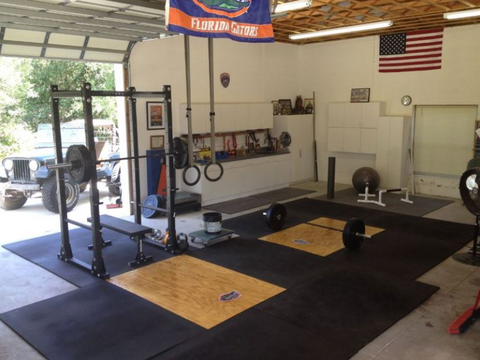
A good environment can motivate you to be more consistent with your training
Do not underestimate the power of removing barriers to good habits. The more "triggers" (I put on this playlist = I lift heavy weight) you have throughout the day, the easier it is to maintain a habit (study, study).
Noise complaints and neighbors
Depending on how much of a pain your neighbors are, you might want to build or invest in a few pieces of equipment that will allow you to breeze through your workout while dropping barbells from overhead on the floor with no complaints.
1.) Starting with the most basic one, we have bumper plates. We will talk about them more in-depth down below, so I'll keep it to the noise aspect here.
Bumper plates are plates made of dense rubber with the center part of the plate made of metal. They are more suitable for violent drops and will increase the durability of the plates, bars, and floor while dampening the sound of the impact a little bit.
Noise is energy dissipated from the vibrations between materials – we want to reduce it as much as possible. Some materials, such as rubber, absorb impact better than iron; and the heavier the object is, the less it will vibrate.
2.) The second thing you want to consider is a weightlifting platform for deadlifts and barbell drops. If you are lifting on concrete you also want it for floor protection. Even if you have standard 3/4" floor mats, you might still want a platform for noise reduction and additional floor protection from heavy overhead drops.
So unless you are planning to get very thick, heavy rubber tiles (2 inches or more), adding sheets of plywood and thinner rubber on top of the floor to help dissipate some of that energy are a good call. They will run at several hundred to a thousand dollars, but are relatively simple to do, making a very good DIY candidate.
As I said, the most important thing when it comes to dampening the noise is MASS, especially low frequencies that vibrate through the floor. Platforms will also dampen the noise to an extent – it will vary depending on the type of platform you choose.
Some extra notes if you go DIY:
- Strive for a unibody construction, so bolt them tightly;
- Be careful to not let the pieces get loose, as vibrations will be transferred through the pieces to the floor. Another reason is to avoid any air between them.
If you drop the barbell with air between sheets of material, they will act as a drum bass and the noise will increase tenfold.

A pair of weightlifting crash mats
3.) Finally, if you don't have space, time or simply don't want a bulkier platform, but still want to drop the bar from overhead (the more minimalistic ones will be fine for deadlifts), you can make yourself some crash mats. They cost about $300 to $400, so... another good DIY candidate if you want to stick to the "on a budget" aspect of this post.
Safety
Assuming you will be most likely lifting alone, you have to guarantee your safety. That is why you might want to invest in a squat rack with safety bars.
They allow you to squat without worrying too much about missing a rep, if you can't just drop the bar on the floor. The same goes for the bench press. They are also great tools to increase your exercise selection, as you can use them as blocks for rack pulls, 3/4 squats or even as a height cue for Romanian deadlifts.
Essential Equipment For An Awesome Home Gym On a Budget
Here is the fun part! If you skimmed the last section you may actually want to go back and read it because there are some points that will save money in the long run.
Free weights vs. machines

Almost every WOD or weightlifting program you will find out there will be centered around the barbell and free weights. It's for good reason: the movements that you can do with the barbell are multi-joint exercises that can be easily loaded for increased mechanical tension that translates really well to increases in real-world strength and power (study, study)
The Barbell
You can pick it up, put it down, press it, pull it, jerk it, throw it, and carry it. It's one of the most versatile pieces of equipment out there, and the one we will build our budget-home gym around.
Renowned strength and powerlifting coach Mark Rippetoe says that the quality of the barbell is the most critical of all pieces in the gym, as it is your connection to the load you are trying to lift.
Roughly speaking, bars come in two diameters: standard (extremities are 1 inch in diameter) and Olympic (2 inches in diameter).
- Standard bars: are about 6 feet long, variable weight, don't have spinning sleeves at their extremities and support very little load without bending (not more than 225 lb). You do not want them, even if you find one for $10.
- Olympic bars: is the one you see around in competitions. They are around 7 feet long and weigh 20 kg for men and 80 inches and 15 kg for women. They also have 50 mm spinning sleeves to prevent the bar from rolling away from your hand as you throw it up in explosive movements (e.g. Clean).
Among Olympic bars, you will find differences in stiffness, sleeve spinning mechanism, knurling, coating and bar thickness. Good bars are expensive, and that is because manufacturing steel is expensive, but they will last you a long time.
Although hard to find, if you are hard-pressed for money, you can look for used bars or buy a cheaper beginner bar like our Wonder Bar if you still aren't that strong (you can drop up to 2 plates from overhead).
One of the advantages of a home gym is that you get to work with a bar you like every time instead of being hostage to the bars at your gym.
Plates & bumper plates
This is very dependent on the type of lifting you intend to do, as well as your tolerance (and your neighbors') to noise. While cast iron plates are definitively cheaper than bumper plates, if you are thinking of dropping the bar on the floor, you probably want bumper plates.
Aside from differences in prices due to the material, plates can be more forgiving when it comes to price than barbells – what makes plates more or less expensive is their weight precision and durability.
If you are not competing and know how much they weigh, so the bar isn't unbalanced, you are fine. In case you are looking to save money, plates are a better candidate than barbells and racks, provided you know their shortcomings and prepare accordingly.
First one, as I mentioned, is weight calibration. Competition bumper plates are more expensive than normal bumper plates because they have to meet stricter weight precision requirements, and thus are harder to manufacture.
Junk plates can weigh vastly different weights than what is actually written on the plate. From my experience, this tends to be more the case with cast iron plates than bumper plates. If you buy used plates, make sure to weigh them to be sure you don't need to do extra balancing on the bar.
Second is the hole in the middle; some plates can be a little bit too big for the bar sleeve. This won't matter much while you are doing anything other than the deadlift, when the bar has to rest on the floor for a portion of the lift.
Bigger holes will also amplify the noise through vibration when you drop the barbell, so keep it in mind. You can minimize the wobbling noise from the plates when you move the bar by fastening them with good collars. But to keep them really tight, you would be looking at powerlifting collars (over $100), so I suggest due diligence.
Finally and arguably the most important part, are the plate combinations you will need. To make sure you are able to progress in small steps and make every possible weight combination between 45 lb plates in 5 lb increments you will need: a pair of 2.5s, a pair of 5s, two pairs of 10s, and a pair of 25s (130 lb total). The number of 45 lb plates you will need will depend on how strong you are.
If you never lifted before and are a guy, get two pairs of 45s; one pair if you are a gal. If you lift already, make calculations starting from that 130 lb total, plus the 45 lb of the bar (so 175 lb total).
The squat rack

You will need somewhere to support the bar, with different height settings to load and lift it safely. Since you will be most likely lifting without a spotter, you might want to invest in a power rack with safety bar.
That can be more expensive, but in your quest to build your budget-home gym you have to ponder the following:
- A power rack with safety pins will cost you maybe $300 more than a squat stand
- Basic flooring (1-inch horse stall mat) for 65 sq. ft. of surface will set you back $400
So what is your workout goal? Will you be dropping the bar from overhead on the floor a lot more than benching and squatting? If so, it makes sense to skip the power rack and go for the flooring.
However, if you are thinking about following a more traditional workout routine, you can postpone the investment of floor treatment a little longer since you won't be dropping the bar on it all the time.
In any case, a simpler squat stand or a more complete power rack with safety bars, you want to consider the following:
- Stability: if you are not thinking about bolting it on the floor, look for ones with a full base, instead of just the four upright stands.
- Height: it must be tall enough for you to do pull-ups and overhead press in it.
- Strength: consider your current strength level and how much stronger you intend to be versus what the rack is made to handle.
- Accessories: you can buy a lot of attachments to make racks even more versatile. For example, you can buy racks with a pull-up bar, weight storage attachments, dip attachments, landmine attachments and lots of other neat things.
- Storage: racks can take up a lot of space, so plan to store your equipment around the rack whenever possible. Storing plates on unbolted racks, for example, will make it more stable and save you some space.
Adjustable Bench & Other Equipment

To finish it up, you will need a sturdy adjustable bench and some other accessories to unlock a bunch more of accessory lifts. We are trying to save as much as money possible by going for very versatile tools.
You can use the bench to do: presses and seated presses variation, elevated bodyweight row, Bulgarian split squats, step-ups, hip thrusts and more.
You can use the gymnastic rings to do: pull-ups, muscle-ups, dips, rows, bodyweight bicep curls, tricep extensions, flyes, elevated push-ups and more.
You can use kettlebells to do: kettlebell swings, goblet squats, shoulder raises, one-arm presses, curls, and extensions (like a dumbbell).
Mobility and recovery: you can snag a lacrosse ball for as little as $4. And I love these things. Every time I have tightness in my back, I just lay on top of one and it's gone. Foam rollers are great for lower back and hamstrings.
You don’t need to get break the bank to have a top-notch facility in your garage. If you stick to high-quality basics, like the ones mentioned above, you can't go wrong.
Leave a comment